13. Reports#
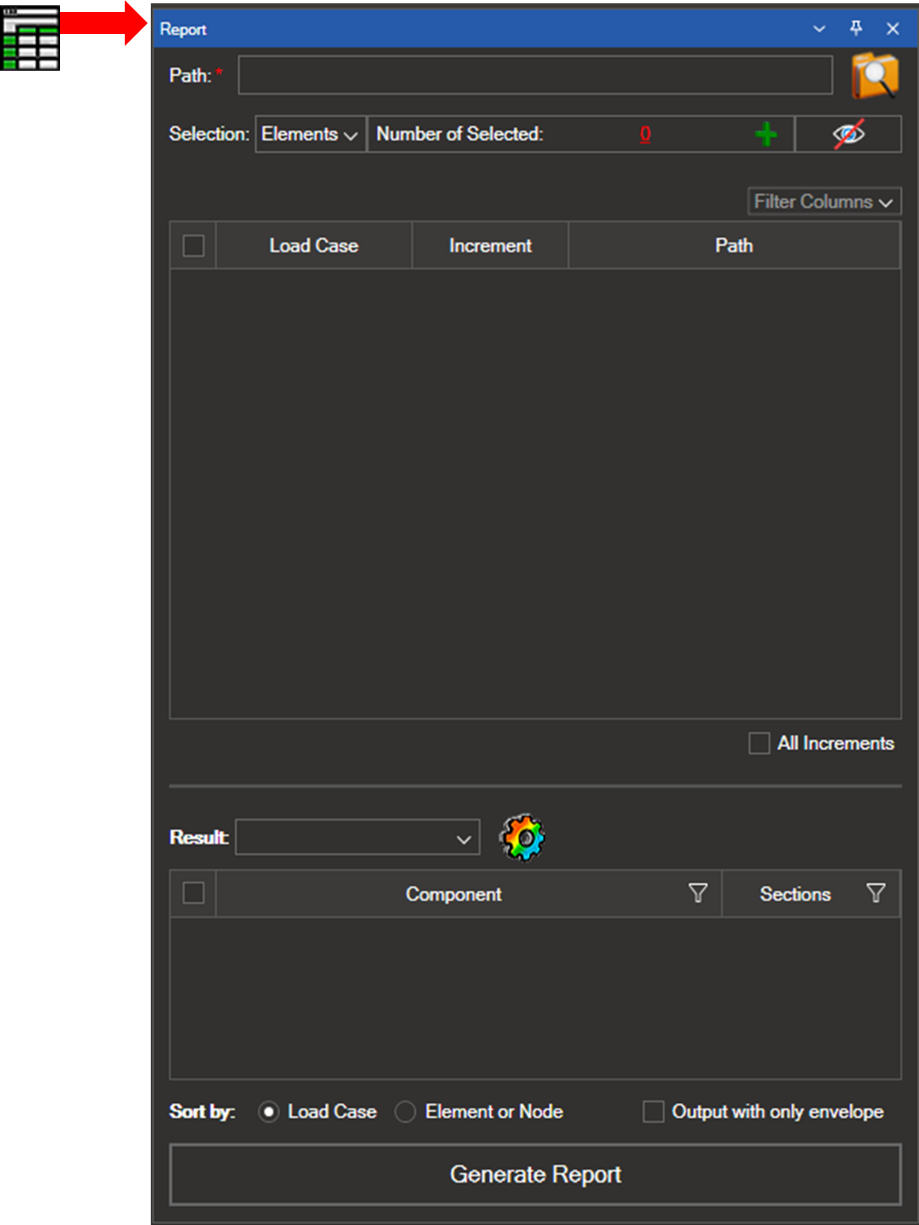
The Reports tool exports selected results to a .csv file.

Click the Save path icon to select the output folder and enter a filename. The selected path is shown in the Path field.
13.1. Steps to create the report#
Select elements/nodes
Choose the elements/nodes from the model for which you want to extract results. After making your selection, click the green plus (+) icon. The count of selected elements/nodes is displayed. Use the eye icon to show or hide the selection.

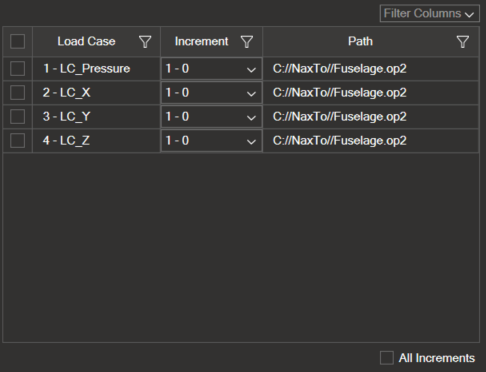
Configure load cases and increments
The table lists the available load cases, increments, and file path. Select the load cases and increments to export. To include all increments for the chosen load cases, select the Select all increments checkbox.
Select result types
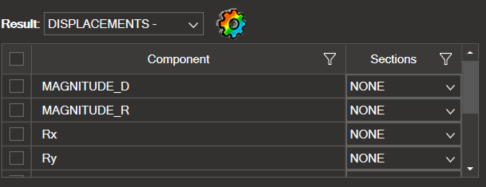
Select the result types to export. In the table, select the components and sections to include.
Organise the
.csvfile
Choose how to organise the
.csvfile:By load case — displays the selected results for each load case.
By elements/nodes — displays the selected results for each element/node.
If you select Output with only envelope, only the envelope results are included.
Generate the report

Once all fields are configured, click Generate report to save the
.csvfile with the chosen name and path.