7. Handling of Scripting and Output Tools#
7.1 Scripting#
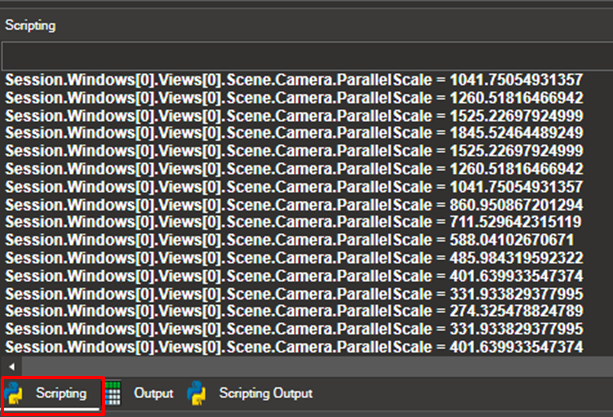
NaxTo View contains an embedded Python console that allows the user to execute Python commands, launch Python scripts and execute application functions.
There are some functions developed for NaxToView that are thought to be executed from the scripting console. These will be explained below.
7.1.1. Basic Usage#
Most actions performed in NaxToView produce the equivalent action in the scripting window. For example, the action of selecting some elements in a model (with Item: Elements selected, shift + hold right click + select elements) automatically outputs a scripting command in the console.
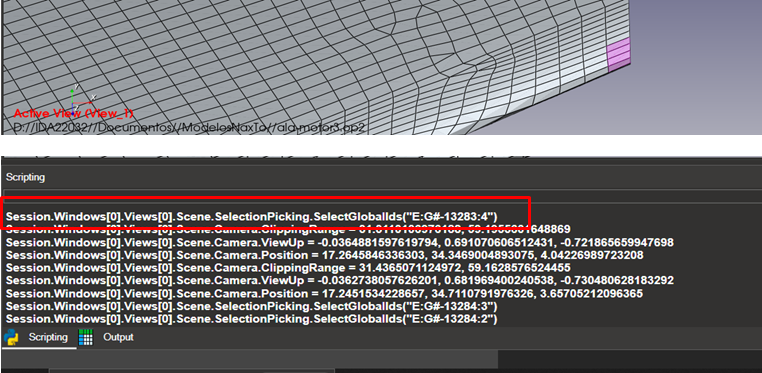
The command
“Session.Windows[0].Views[0].Scene.SelectionPicking.SelectGlobalIds(<…>)” appears. Notice that, if the user clears the selection and executes that command, the same elements will be selected.
 Clear Botton
This can be useful to automate some actions. More complex tasks can be executed using File > Run Python Script

Note:If the selection does not automatically appear, it is because the scene does not render the screen after a scripting command. Simply click on the model and the selection will appear.
7.1.2. Aplication Overview#
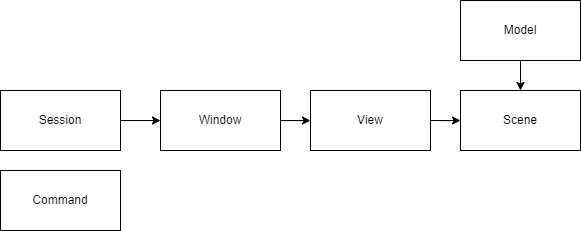
For most of the functionalities, it is important to understand the hierarchy of the application. This will help to use the methods intuitively and maneuver the commands as the GUI.
The command prompt has access to 2 scopes:
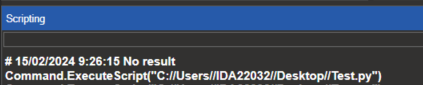
Command: it is a built-in way to execute scripts. For example:
Session: it contains all the information and methods accessible by the user
The architecture overview is as follows:
7.1.3. Detailed Functionality#
Loading a new model
Case 1: load from session (i.e. Application just started).
It creates a new Window, View, and Scene to store the model. If there is an existing Scene containing a model, it replaces it.
Case 2: session already created. Load model in certain view
Create a new view in the first window. Session.Windows[0].Create View (“New view”)
Load model in the newly created view. Session.Windows[0].Views[1].LoadModel1FEM(“ida22032//Models//wind3.op2)
Selection of elements and nodes
There are two ways of selecting entities in the application. The first one is using global ids (for internal use of the engine). The second option is the usage of solver ids. These are always composed of a superelement -or part- and an element/node id.
ID encoding: for ease of use, the application uses an encoding of ID ranges in a string format. The first part is composed of control charecters: ‘E’ or ‘N’ (element/node selection), ‘:’ and*‘S’* for solver selection. After these, the compressed string of ids. For each part/superelement, the string begins with ‘#Part_
@’ and the ids. Each range is defined with :, and each group is split with ,. For example, ids 1,2,3,6,7,8 would be codified as “1:3,6:8”.
The following example selects elements 34750 to 34760, and 34800 to 34806: Session.Windows[0].Views[0].Scene.SelectionPicking.SelectGlobalIds(“E:S#Part_0@34750:34760,34800:34806”)
Creation of macros
NaxToView allows the creation of macros defined by the user. These macros allow the user to execute scripts directly from the application interface.
In order to create a macro, there are two options:
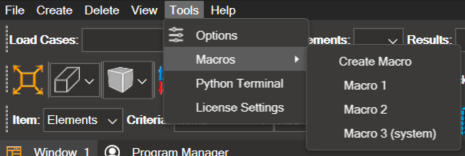
Create it from the user interface: This can be done by clicking on Tools > Macros > Create Macro. This will open a window where the user can define the name of the macro, the script to execute (this can be a new script to be created or an existing one), and whether it should be available for all user or not. After creating the macro, the Scripting IDE will open with the script selected for the macro.
Create it through scripting: In order to create a macro through scripting, the script to execute must be stored in the macros folder either inside the AppData folder of the user (%LOCALAPPDATA%\IDAERO\NaxTo_<version>\macros), or in the ProgramData folder (C:\ProgramData\IDAERO\NaxTo_<version>\macros) if the macro is intended to be available for all user. Then, the macro can be created with Session.CreateMacro(“First macro”, “Test.py”) if the macro is for only the user, or Session.CreateMacro(“First macro”, “Test.py”, system_macro=True), if the macro is intended for all users. This will create the new macro and store it inside macro_dict.xml, so it will be available the next time the program is executed.
The script files used for macros must have the .py extension and must have unique names. If a macro is created with the same name as another macro, it will fail.
Once a macro is created, it will appear in the Tools > Macros menu.
By right-clicking on the macro, the user can delete it, or open the Scripting IDE to edit it. By deleting it, the macro will be removed from macro_dict.xml, but the script associated with it will remain in the macros’ folder.
Alternatively, the user can edit, delete, and rename the macro by executing Session.EditMacro(“NameOfMacro”), Session.DeleteMacro(“NameOfMacro”), and Session.RenameMacro(“NameOfMacro”, “NewName”) respectively.
If the user wants to move the macro from the AppData folder to the ProgramData folder, or vice versa, it can be done by deleting the macro, moving the associated script to the respective folder, and creating the macro again with the system_macro option set to True if the macro was moved to the ProgramData folder.
Creation of buttons
Some interface elements, such as buttons, can be added by the user. In order to do this, a script with the action that the button performs must be included in the actions folder either inside the AppData folder of the user (%LOCALAPPDATA%\IDAERO\NaxTo_<version>\actions), or in the ProgramData folder (C:\ProgramData\IDAERO\NaxTo_<version>\actions) if the button is intended to be available for all user.
Optionally, an icon can be assigned to the button. To do this, add the icon in png format to the folder “icons” inside the actions directory. If the folder does not exist, it can be created.
Then, the button can be created with one of the following commands:
Session.CreateButton(“NewButton”, “Test.py”, “Test.png”) - User Button
Session.CreateButton(“NewButton”, “Test.py”, “Test.png”, system_button=True) - System Button (for all users)
Notes:
The button name shall be only one word. CamelCase and underscores are allowed.
The button name must be unique, so it cannot be the same as another button.
The script file must have the .py extension and must have a unique name.
If the icon parameter is left blank, the button name will be displayed instead.
This will create the new button and store it under action_dict.xml, so it will be available the next time the program is executed.
The button can then be moved around the toolbar by dragging it from the dotted vertical line to the left.
A button can be deleted by executing Session.DeleteButton(“ButtonName”). This will remove the button from action_dict.xml, but the script associated with it will remain in the actions’ folder.
In order to change the name of a button, said button must be deleted and created again associated to the same script and icon, but with the new name.
Loading scripts
The user can define actions to be performed right after the application initialization. The desired commands should be added to the “autorun.py” script in the actions’ directory either inside the AppData folder of the user (%LOCALAPPDATA%\IDAERO\NaxTo_<version>\actions), or in the ProgramData folder (C:\ProgramData\IDAERO\NaxTo_<version>\actions) if it is intended for all users to execute the commands.
If a determined script is to be executed on load, it can be done by adding the following command to the autorun.py script:
Command.ExecuteScript(r”C:\path\to\script.py”)
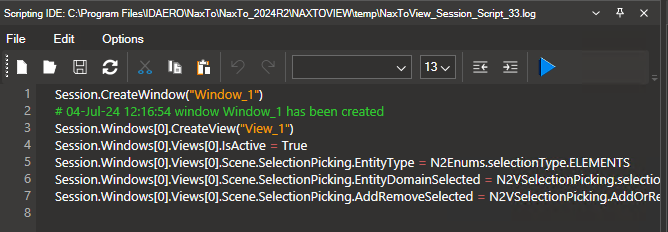
7.2. Scripting IDE#
This powerful tool allows you to create and run Python scripts that execute inside NaxToView. It can range from simple scripts containing a few commands to the automatization of complex processes inside NaxToView creating your own interfaces and buttons.
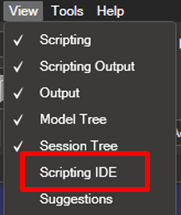
The tool can be opened in three different ways:
Clicking on View > Scripting IDE
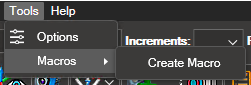
Clicking on Tools > Macros > Create Macro
Right clicking on the scripting window to open the tool with the code of the current session. In this example, the Scripting IDE has been opened with the same code as the
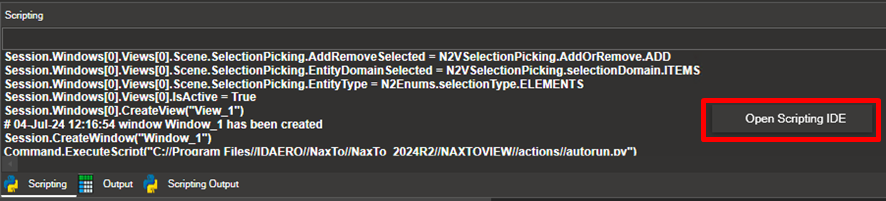
In this example, the Scripting IDE has been opened with the same code as the session scripting window
7.2.1. IDE controls#
The tool offers the following editing controls.

 Opens a new blank file, closing the current opened file.
 Opens an existing file.
 Saves the file.
 Refresh: If the file is opened in another program, and it changes, this control updates the contents of the file.
 Cut, Copy, and Paste.
 Font Settings.
 Indent right or left.
 Run Script: Runs the script and executes every method and property into the current session.
7.2.2. Autocomplete#
The scripting IDE also comes with an autocomplete feature for every method and attribute that is inside Session and its children.
 Method
 Attribute
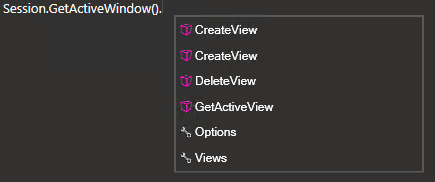
Every time you press “.”, a dropdown will appear with the available methods or properties. In this case, the methods and properties available are related to a Window.
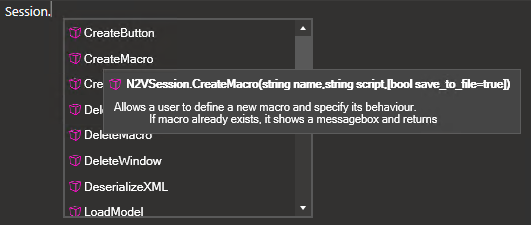
For each method or property there is documentation available when hovering the mouse over the name of the method or property in the dropdown.
7.3. Output#
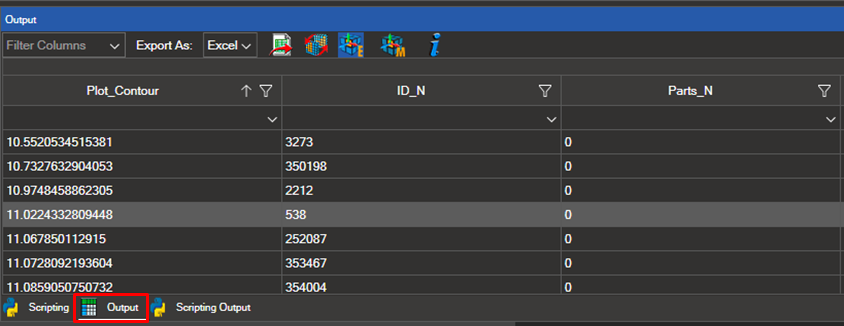
The “Output” tool displays the output information for the selected elements, nodes, and coordinate systems. To start using the tool, follow these steps:
7.3.1. Plot Results and Make a Selection#
Select the elements, nodes, or coordinate systems you wish to analyze.
Once the selection is made, all results will be displayed in the Output table.
7.3.2. Customize Table Columns#
You can show or hide different columns in the table. To do this, access the “Filter Columns” section in the top left corner of the table.

Simply check the columns you want to display and uncheck those you do not. You can filter by plot contour, element or node IDs, properties, materials, etc.
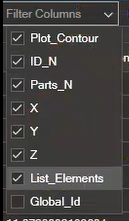
You can also filter the information within each of these options.
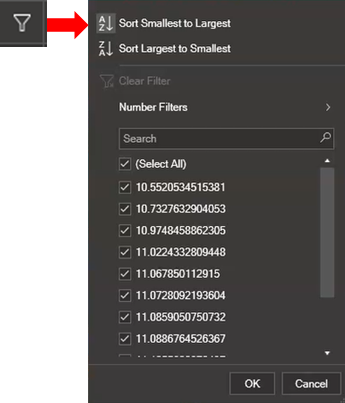
7.3.3. Filter and Sort Values#
Clicking on the filter icon opens a dropdown menu that allows you to filter by values and sort them in ascending or descending order.
Clicking the dropdown arrow allows you to filter by:
Equals
Does not Equal
Less tan
Less than or Equal
Greater tan
Greater than or Equal
Null
Not Null
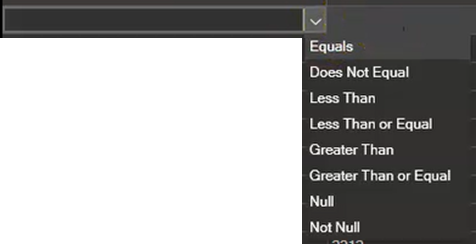
Enter the value in the box next to the arrow.
7.3.4. Export Data#
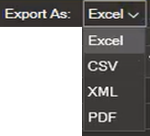
You can export the visible information in the table in Excel, CSV, XML, or PDF format.
To do this, select the export format from the dropdown menu and click the corresponding icon.
 Clicking this icon updates the selection of the model shown in the 3D view according to the table values. If any value is hidden in the table, clicking this icon will deselect those values in the model.
7.3.5. Coordinate Axes Visualization#
 Element Coordinates Icon: Clicking this icon displays the coordinate axes of the selected elements. To hide them, click the icon again.
 Material Coordinates Icon: Clicking this icon displays the coordinate axes of the materials of the selected elements. To hide them, click the icon again.
Zooming in on the selected elements allows you to see their coordinate axes.
 The last icon is the Information icon. Clicking it opens this user guide in the same section.